
Introduction
Sometimes we need to upload images for our personal blogs or share them with other projects. If you, like me, prefer to have your images hosted on your own server rather than on third-party platforms, building a personal image hosting service (image bed) is highly recommended.
This article will introduce how to use Docker to quickly deploy an image hosting service based on EasyImage 2.
EasyImage Features
EasyImage is simple yet powerful. Being database-free makes it highly suitable for low-spec servers.
- Supports WebP format conversion
- Supports login-only uploads
- Supports setting image quality
- Supports text/image watermarks
- Supports specifying image width/height
- Supports converting uploaded images to specified formats
- Supports minimum width/height upload limits
- Supports API
- Online image management
- And more features
Deployment
The commands in this article apply to Debian 12 and must be executed as the root user. Please use sudo -i or su root to switch to root.
Installing Docker
If you haven't installed Docker and Docker Compose yet, please refer to:
First, update and install software:
1 | apt update |
Then, add Docker's GPG public key and apt repository:
1 | curl -sSL https://download.docker.com/linux/debian/gpg | gpg --dearmor > /usr/share/keyrings/docker-ce.gpg |
For machines in Mainland China, you can use the domestic mirror from Tsinghua TUNA:
1 | curl -sS https://download.docker.com/linux/debian/gpg | gpg --dearmor > /usr/share/keyrings/docker-ce.gpg |
After that, update the system package lists and install Docker CE and the Docker Compose plugin:
1 | apt update |
Now you can use the docker version command to check if the installation was successful:
1 | root@debian ~ # docker version |
1 | root@debian ~ # docker compose version |
Reference: Debian 12 / Ubuntu 24.04 Docker and Docker Compose Installation Tutorial
Creating docker-compose.yaml
Using docker compose to manage Docker projects eliminates the need to remember complex docker run commands and allows managing different projects in one place, which is much more convenient.
First, choose a suitable location, e.g., /root/docker-project/, create a project folder inside it, and create docker-compose.yaml within that folder.
Then fill in the following content:
1 | services: |
In the configuration of docker-compose.yaml, the part before : corresponds to the host, and the part after corresponds to the Docker container.
docker compose commands must be executed in the directory containing docker-compose.yaml.
In this configuration, we will access the project via http://<server-ip>:8080, and the actual data will be stored under /root/data/docker_data/easyimage on the server.
Running
First, use the following command to pull the image:
1 | docker compose pull |
Then start the container:
1 | root@debian ~ # docker compose up -d |
If there are no errors, it means the container started successfully. Visit http://<server-ip>:8080 and the EasyImage 2.0 Installation Environment Check page will display. Click Next to continue: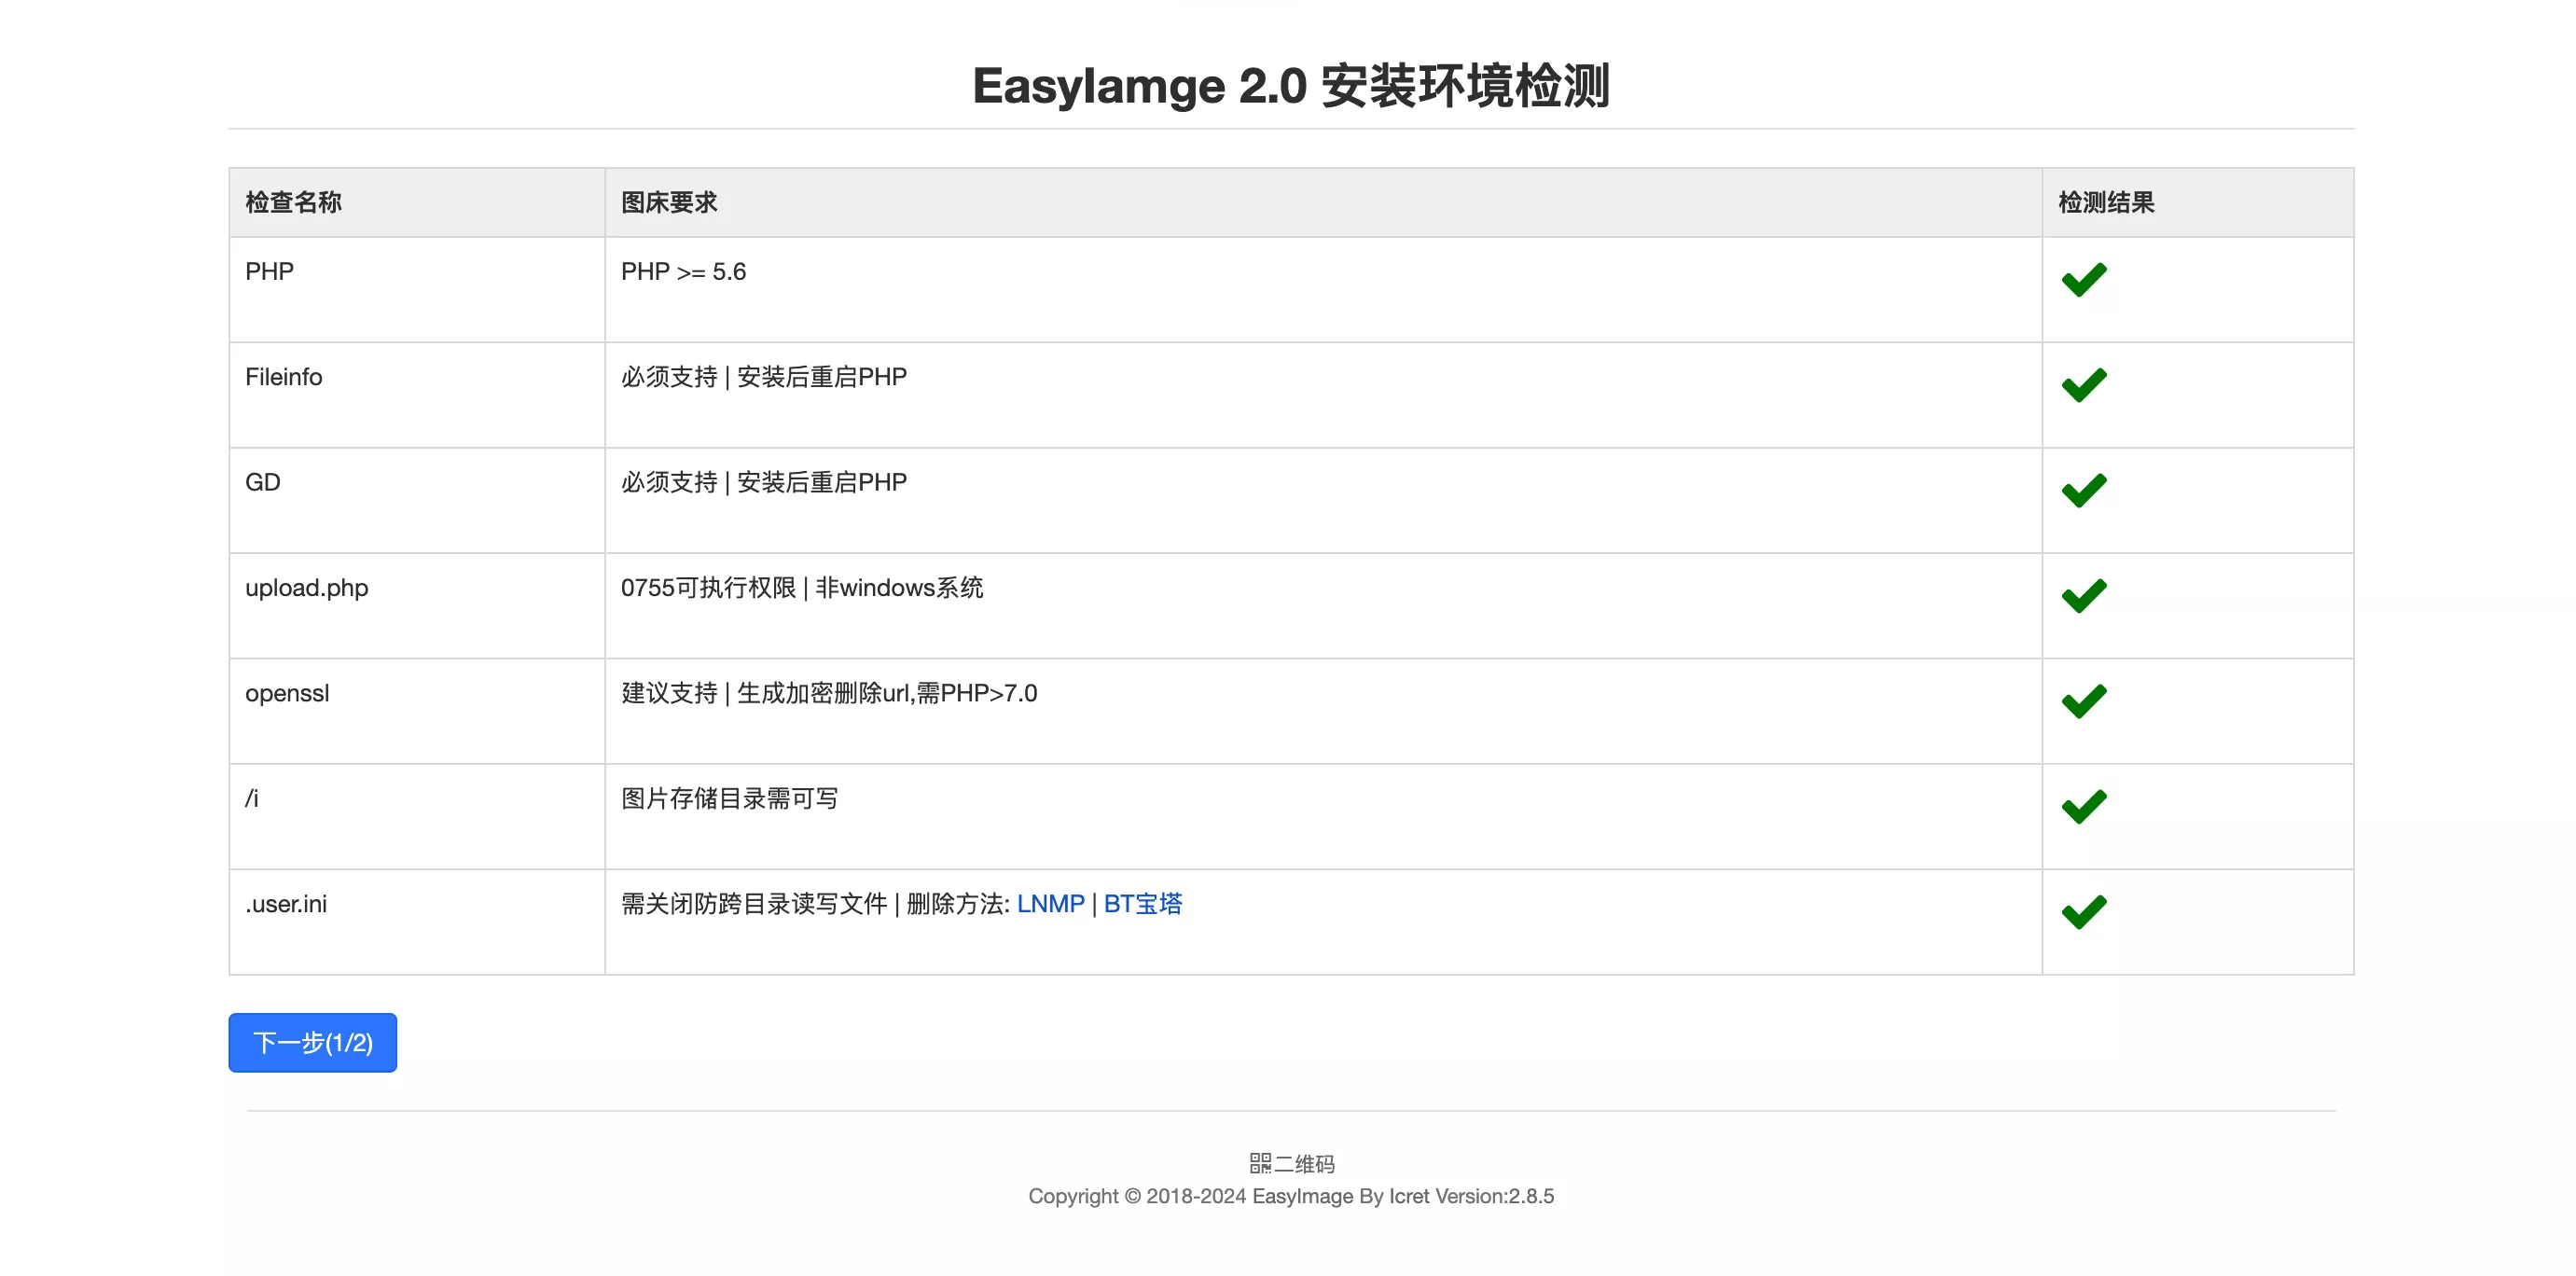
However, if you own a domain and want to set up an Nginx reverse proxy, you can stop the Docker project first to configure Nginx:
1 | docker compose down |
Setting Up Nginx Reverse Proxy
It is recommended to use Nginx Proxy Manager for setup, or manually write the reverse proxy section in the configuration file:
1 | location ^~ / |
Test and reload Nginx configuration:
1 | nginx -t |
Then we can modify the port configuration in docker-compose.yaml as follows, so that port 8080 is no longer exposed to the public:
1 | ports: |
Restart the container, and access https://your-domain to continue the configuration.
1 | docker compose up -d |
Click Next to reach EasyImage 2.0 Basic Site Configuration:
- Set the domain (remember to use
https://for the site URL) - Set the admin account (change to your preferred username and password)
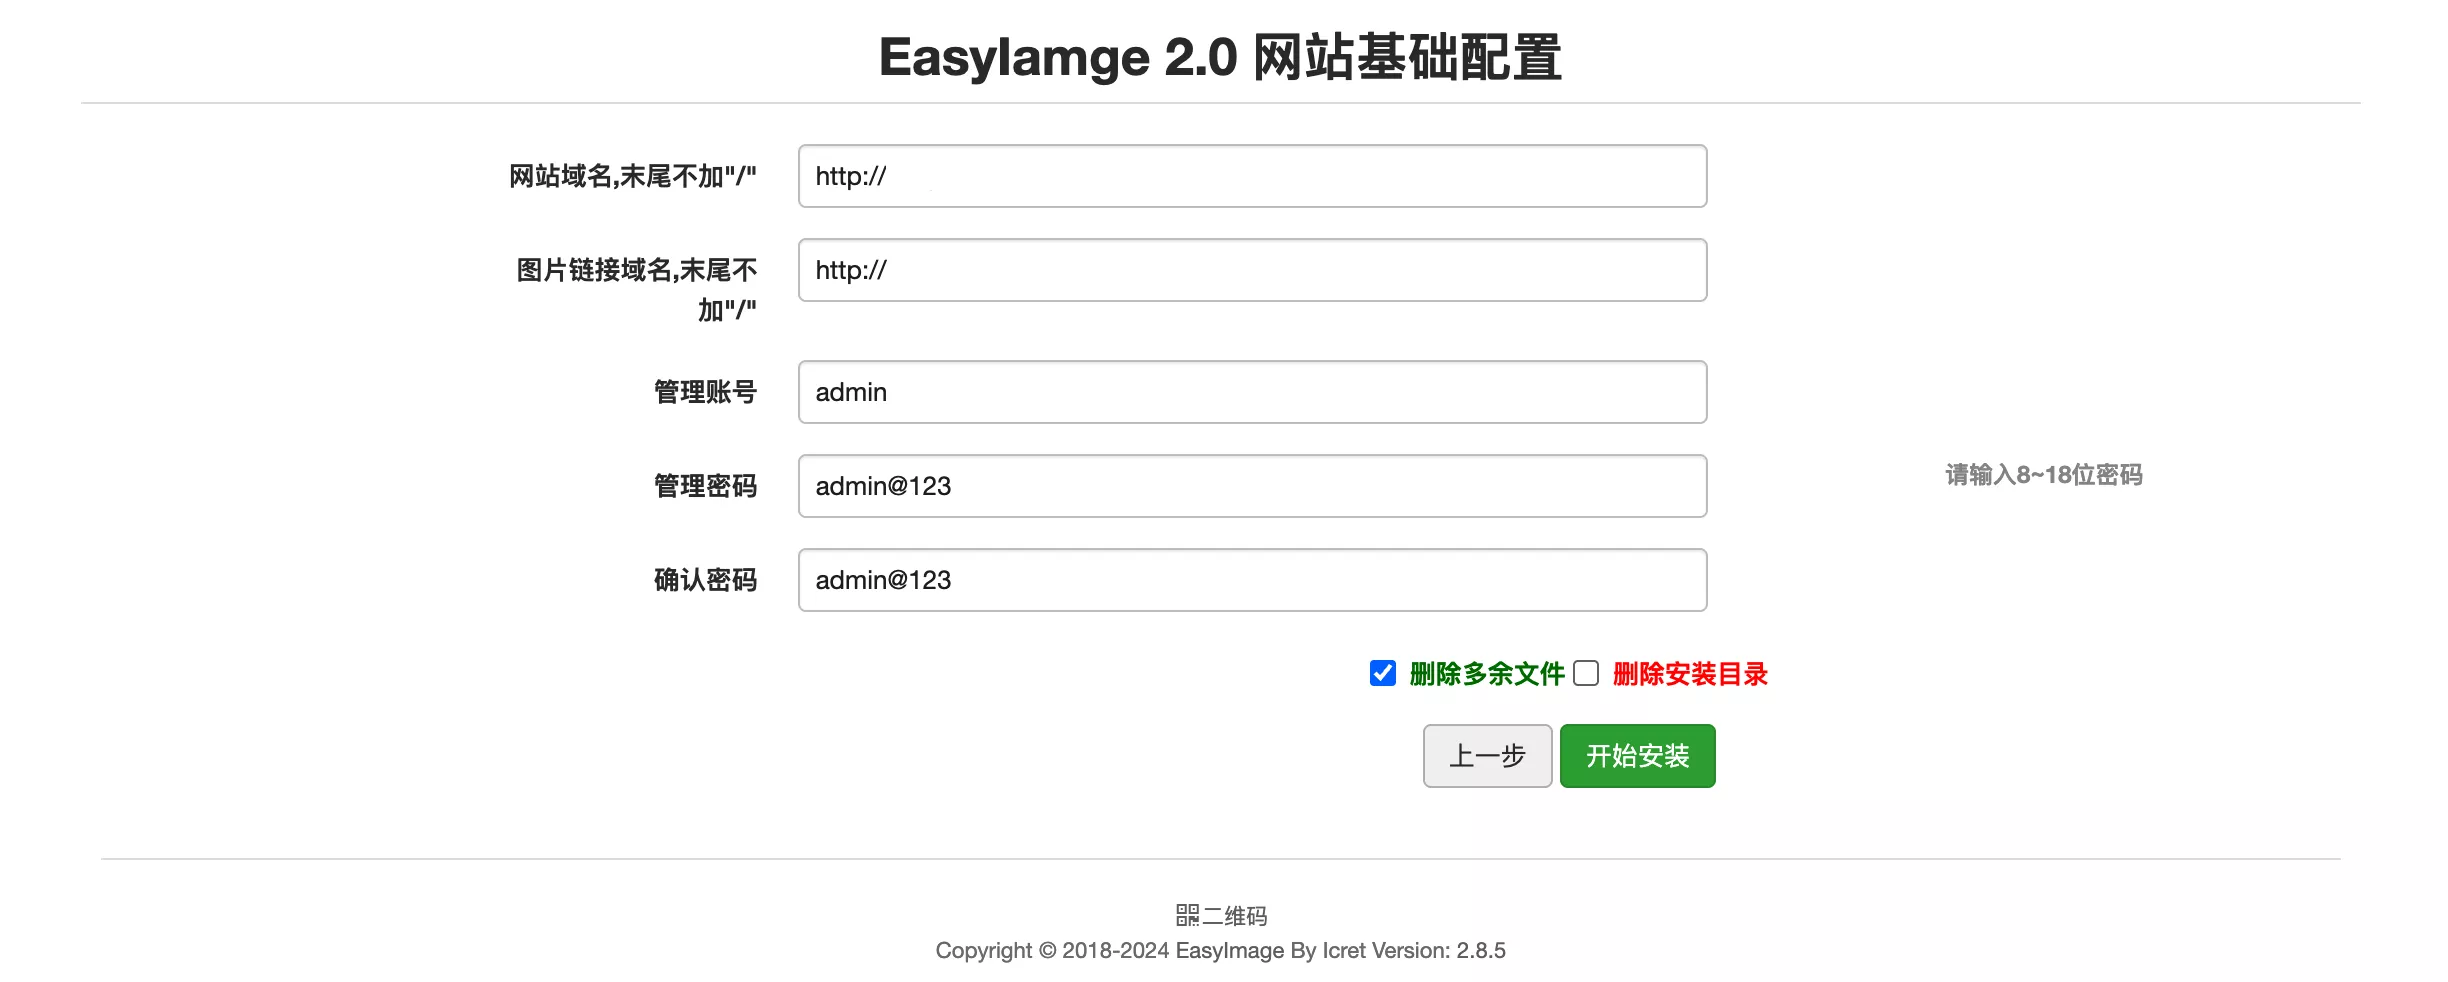
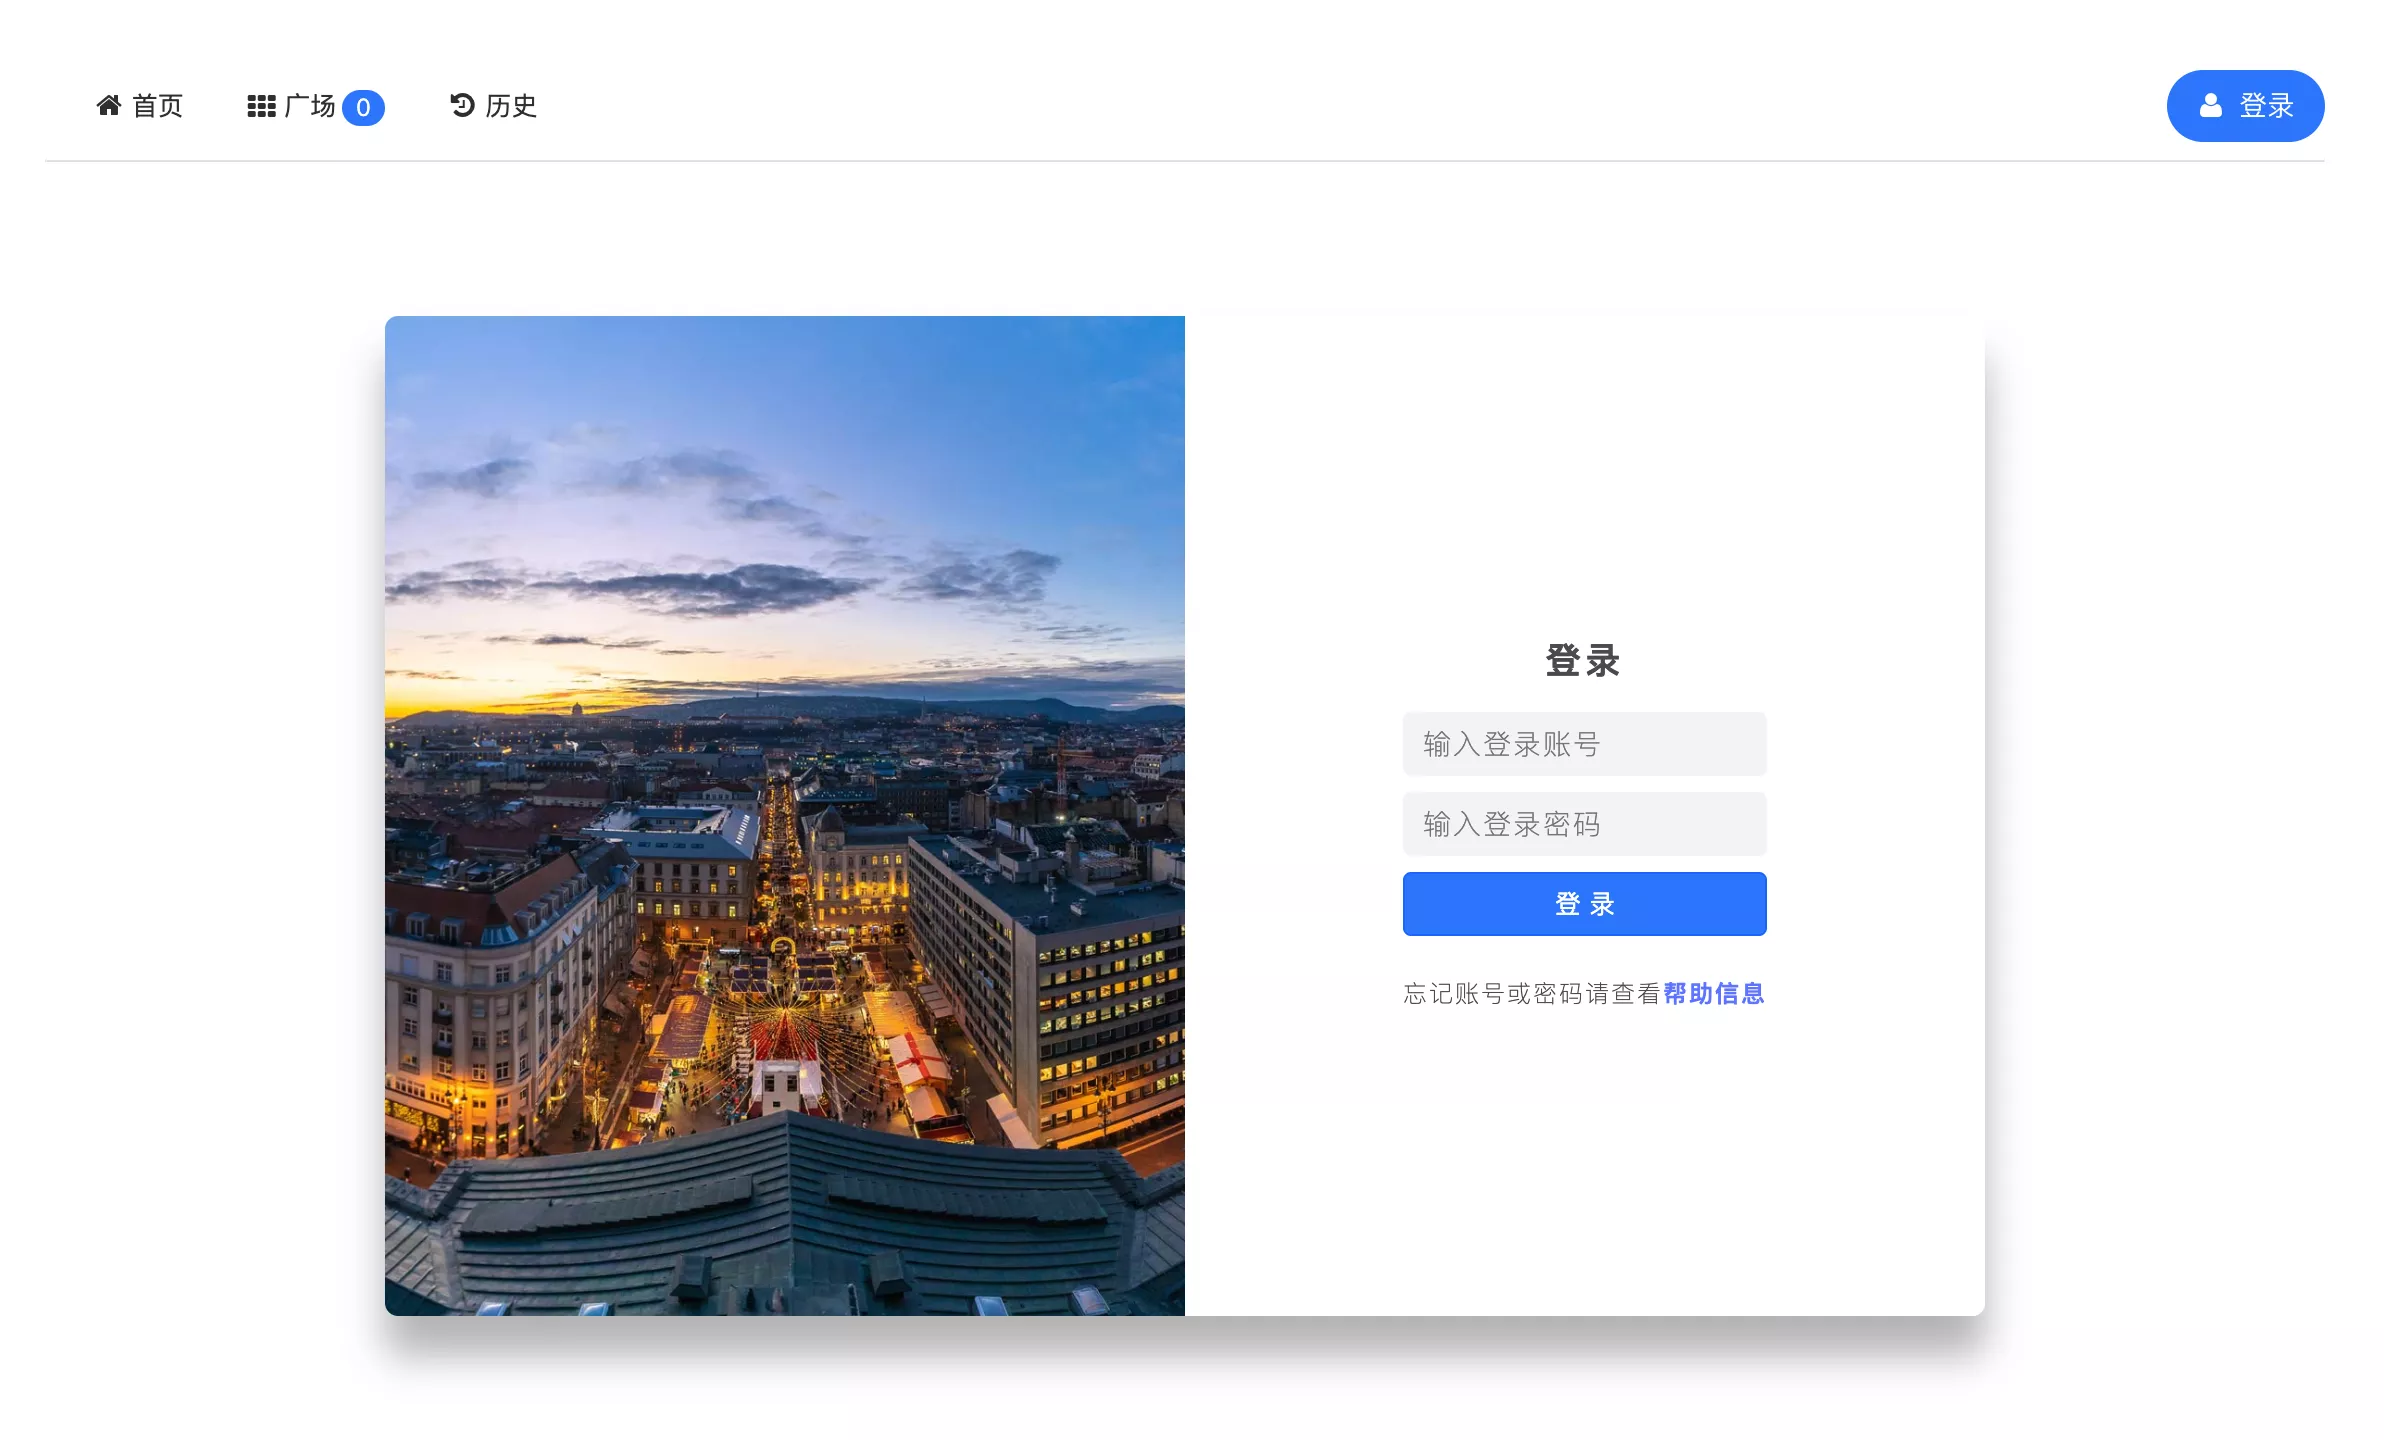
After setup, you will be redirected to the login interface to log in.
Adjusting Settings
Since it is for personal use, you can perform some security adjustments. Go to Settings and modify:
- Security > Enable Login Required to Upload and CAPTCHA
- API Settings > Disable the existing Token, and add a new one if needed.
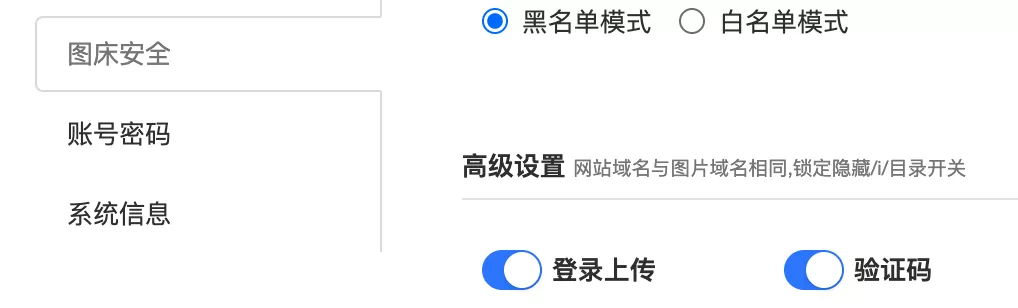
To save storage space, you can set Upload Image Format Conversion to WEBP in Upload Settings. Since WebP is widely supported now, there's no need to worry about compatibility issues.
Using PicGo for Uploads
Opening the webpage every time you want to upload can be tedious. EasyImage supports API uploads, so you can install PicGo:
Enabling API Upload Function
Log in to the admin panel > Security > Advanced Settings > Enable API Upload.
Downloading PicGo
Visit https://github.com/Molunerfinn/PicGo/releases to download it.
On macOS, if it prompts that it is damaged, open the terminal and execute the following command (press Enter and input your Mac password for authorization):
1 | sudo xattr -d com.apple.quarantine /Applications/PicGo.app/ |
Installing the web-uploader Plugin
Reference: Using PicGo to Upload
Open PicGo, search for web-uploader in Plugin Settings, and install the first one: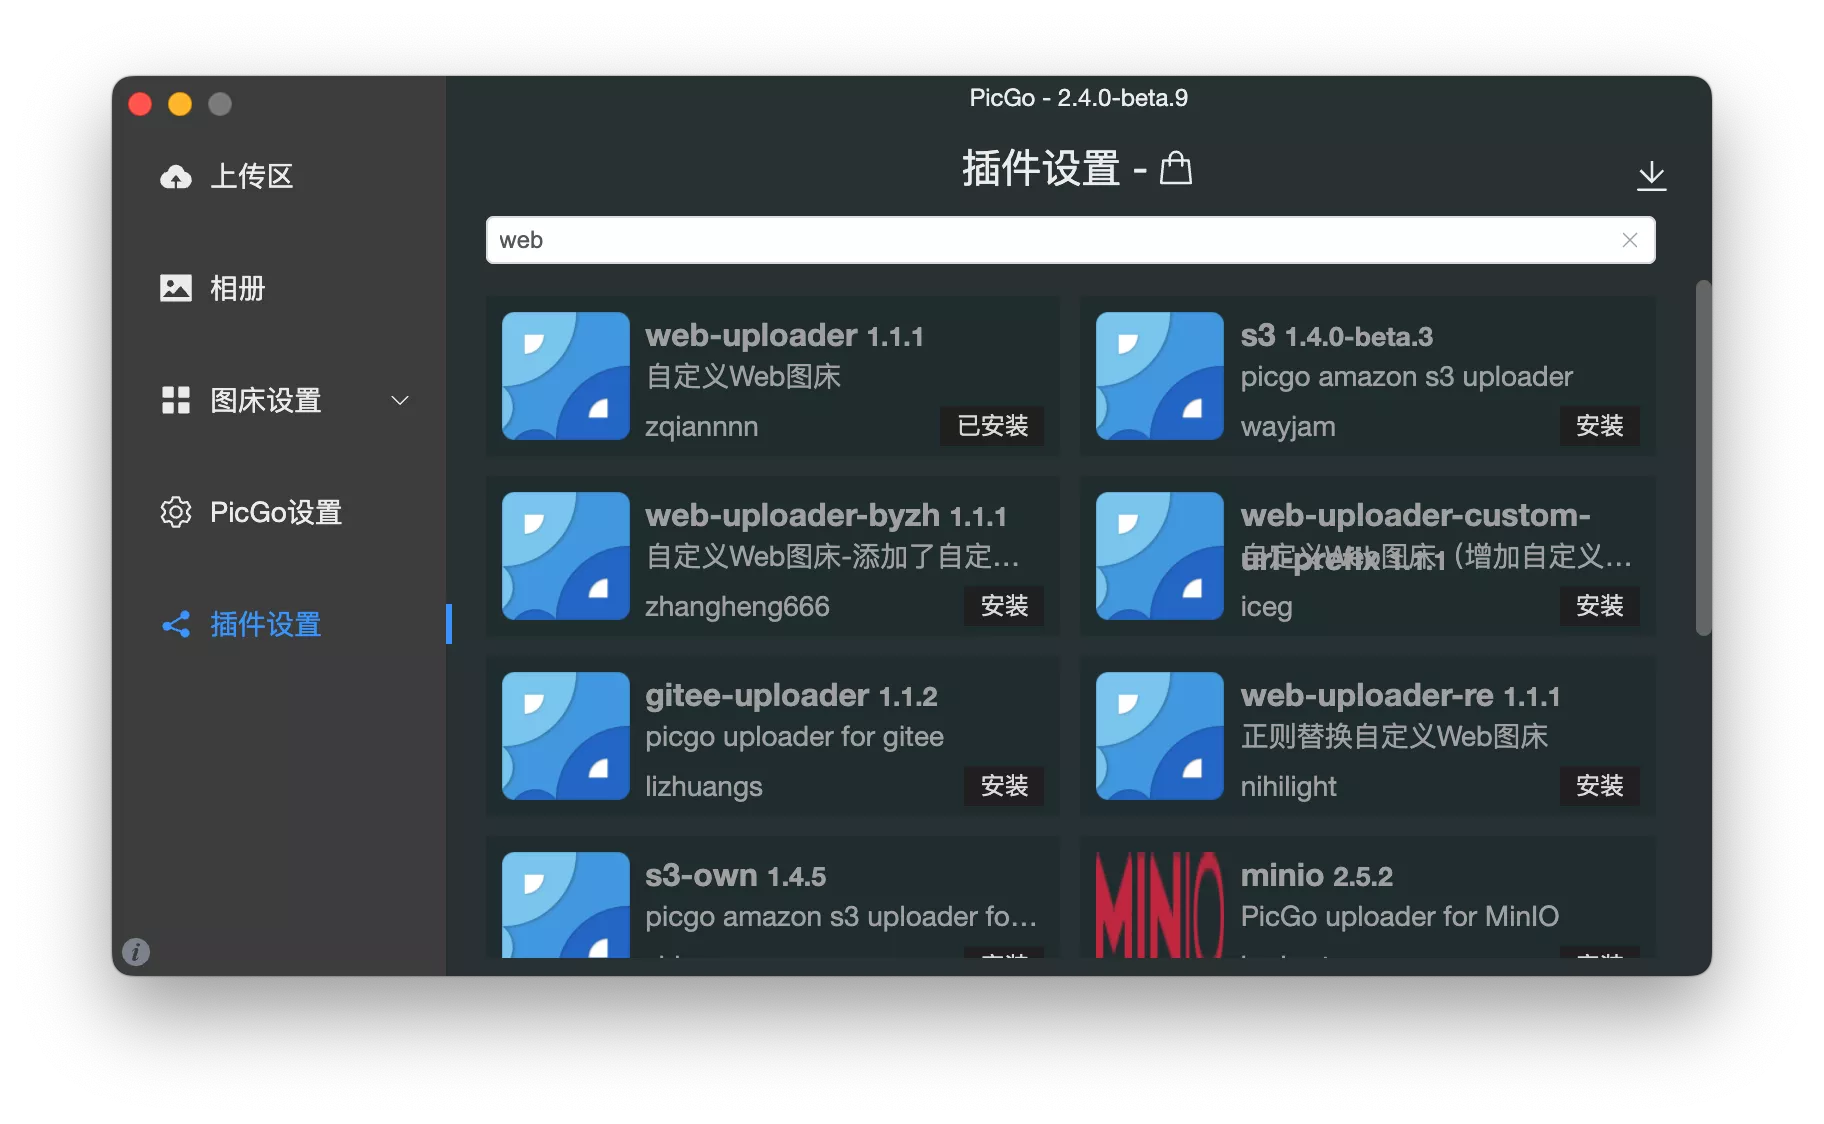
Click on Bed Settings on the left, find Custom Web Bed, and add a new configuration.
Configuration page:
- Show name: Give it a name.
- API URL: Obtain from admin panel > Settings > API Settings.
- POST parameter name:
image - JSON path:
url - Custom Headers: Leave empty.
- Custom Body:
{"token":"your token"}(token can be obtained from admin panel > Settings > API Settings page).
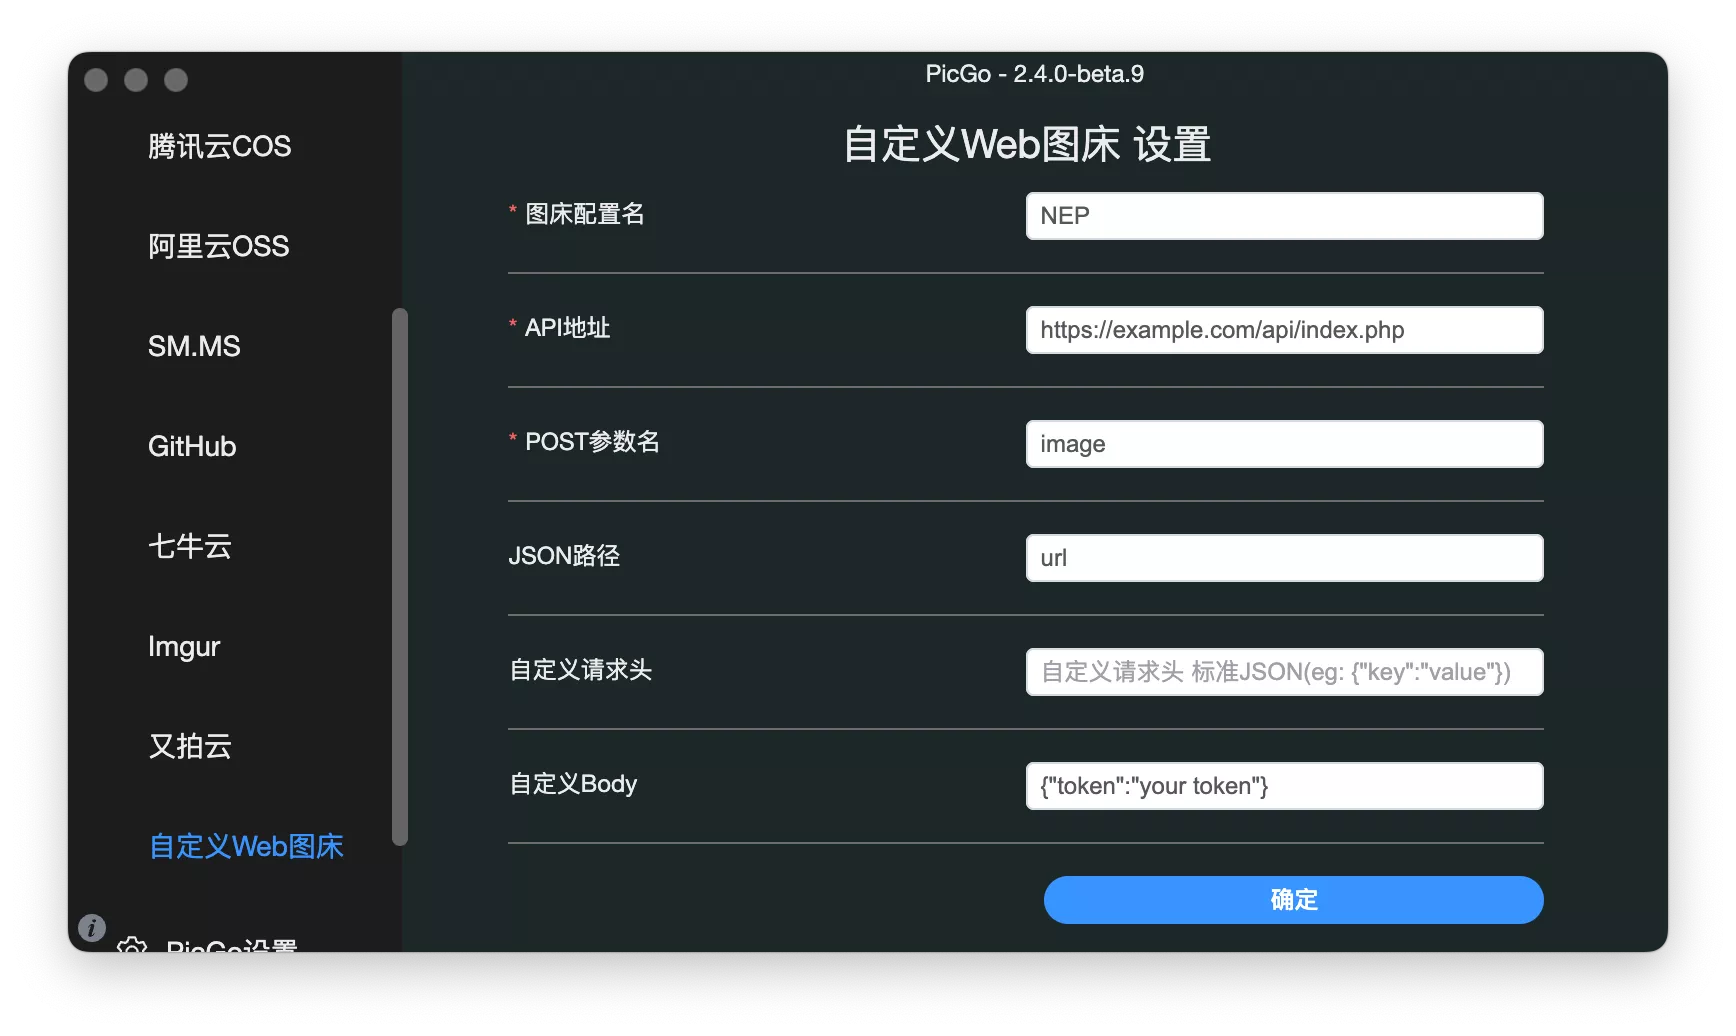
Then go back to the Upload Area, select the newly added custom bed, and you can now upload images using PicGo.
Summary
EasyImage is simple, database-free, and has very low hardware requirements and resource usage, making it an excellent choice for a personal image hosting service.
However, due to the lack of a database, you cannot retain original file names (though you can enable logging in settings) or group images into albums.
Error Information
Nginx 413 Upload Failed
If the upload fails and the browser Console displays a 413 error, you can adjust the size limit in your Nginx reverse proxy settings:
1 | client_max_body_size 10m; |
Others
Deleting Images
Log in to the admin panel > File Management > Delete File > Delete Single Image to quickly delete a specific image using its URL.
Or use the file manager to delete it.
Future Backup and Migration
If you need to switch servers or stop using EasyImage in the future, you only need to back up the /i/ directory under your website configuration, as all uploaded images are stored there.
Using Different Domains for the Panel and Images
Since EasyImage stores images locally, we can easily specify different domains for the site panel and the images in the site settings, for example:
- Site Domain:
https://upload.example.com - Image Domain:
https://img.example.com
We can modify the volume mapping in docker-compose.yaml as follows:
1 | volumes: |
Then, set the root directory of https://img.example.com to /var/www/img.example.com in the host's Nginx configuration:
1 | server { |
Comments