
Introduction
Welcome to my world! This is Mr. O. Have you ever thought about having your own blog to record your daily life, share your experiences, or showcase your professional skills?
Actually, building a personal blog is not as complicated as you might think. With the free hosting service provided by GitHub and the powerful, easy-to-use Hexo static blog framework, we can easily build our own blog platform. What's more, this process is completely free!
In this article, I will take you step-by-step through how to use GitHub Pages and Hexo to quickly deploy a beautiful and practical personal blog, letting your thoughts run free in the online world.
Let's get started!
Hexo
Hexo is a fast, simple, and efficient blog framework that supports a rich variety of themes. We only need to write articles using Markdown syntax, and Hexo will generate the website files for us.
GitHub
GitHub is the world's largest code hosting website and open-source community. We can use GitHub's free Pages service to host our blog.
If you don't have a GitHub account yet, you can sign up for free: https://github.com/signup
Prerequisites
After having a GitHub account, we need to install the following software on our computer:
- Install Node.js: Check How to install Node.js
- Install Git
- Windows: Download the installer package to install.
- macOS: Automatically installed when installing Homebrew.
- A text editor, recommended to install Visual Studio Code
After installing VS Code, you can click on Extensions on the left, search for Simplified Chinese to install the language pack, click Install, and then click Change Language and Restart in the bottom right corner to restart.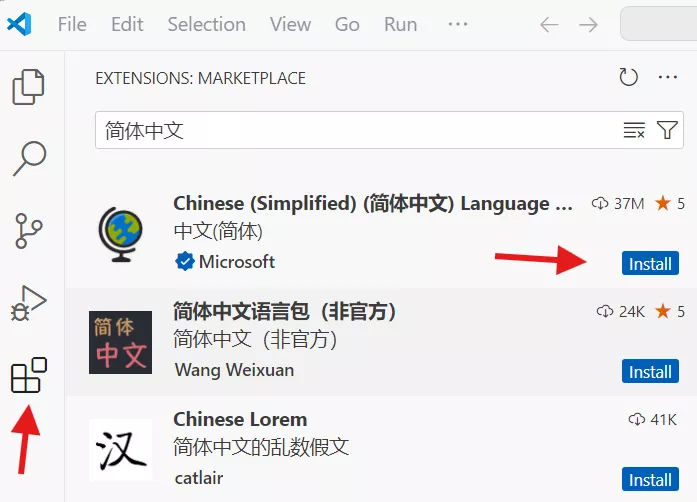
After installation, open the terminal program. You can verify the installation by checking the version commands.
1 | > npm -v |
How to open the terminal:
In VS Code, you can press the `Ctrl + `` (the key below Esc) shortcut to open the terminal at the bottom.
You can also use the menu Terminal > New Terminal
Error running commands in VS Code terminal?
Just set the default profile to CMD.
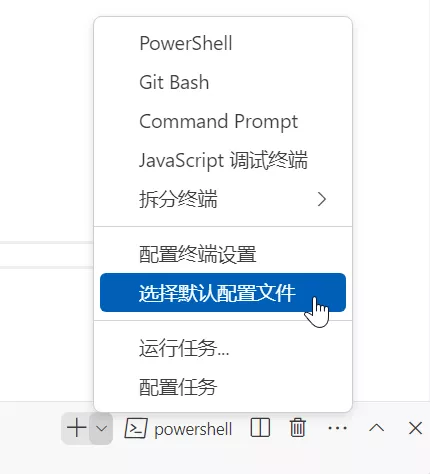
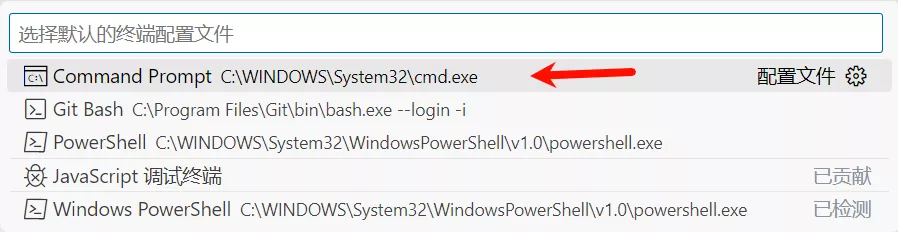
Then close and reopen VS Code.
Installing Hexo
We need to install the Hexo CLI using the npm command in the terminal:
1 | npm install hexo-cli -g |
After execution, run the hexo -v command. If the version information is successfully printed, it means the installation was successful:
1 | > hexo -v |
Next, create an empty folder to store your blog files. Once created, open it in VS Code by selecting Open Folder. Then open VS Code's terminal and run the following commands sequentially.
Initializing the Blog
1 | hexo init |
Now look at the VS Code sidebar; many files have been automatically generated. Generally, we only need to focus on the contents inside the source directory, where _posts is where we store our blog posts.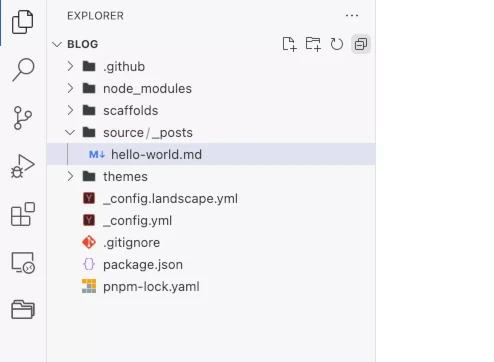
Previewing the Blog
You can use the hexo s command to preview your website locally on your computer.
1 | > hexo s |
Then you can open your browser and visit http://localhost:4000/ to view the website preview.
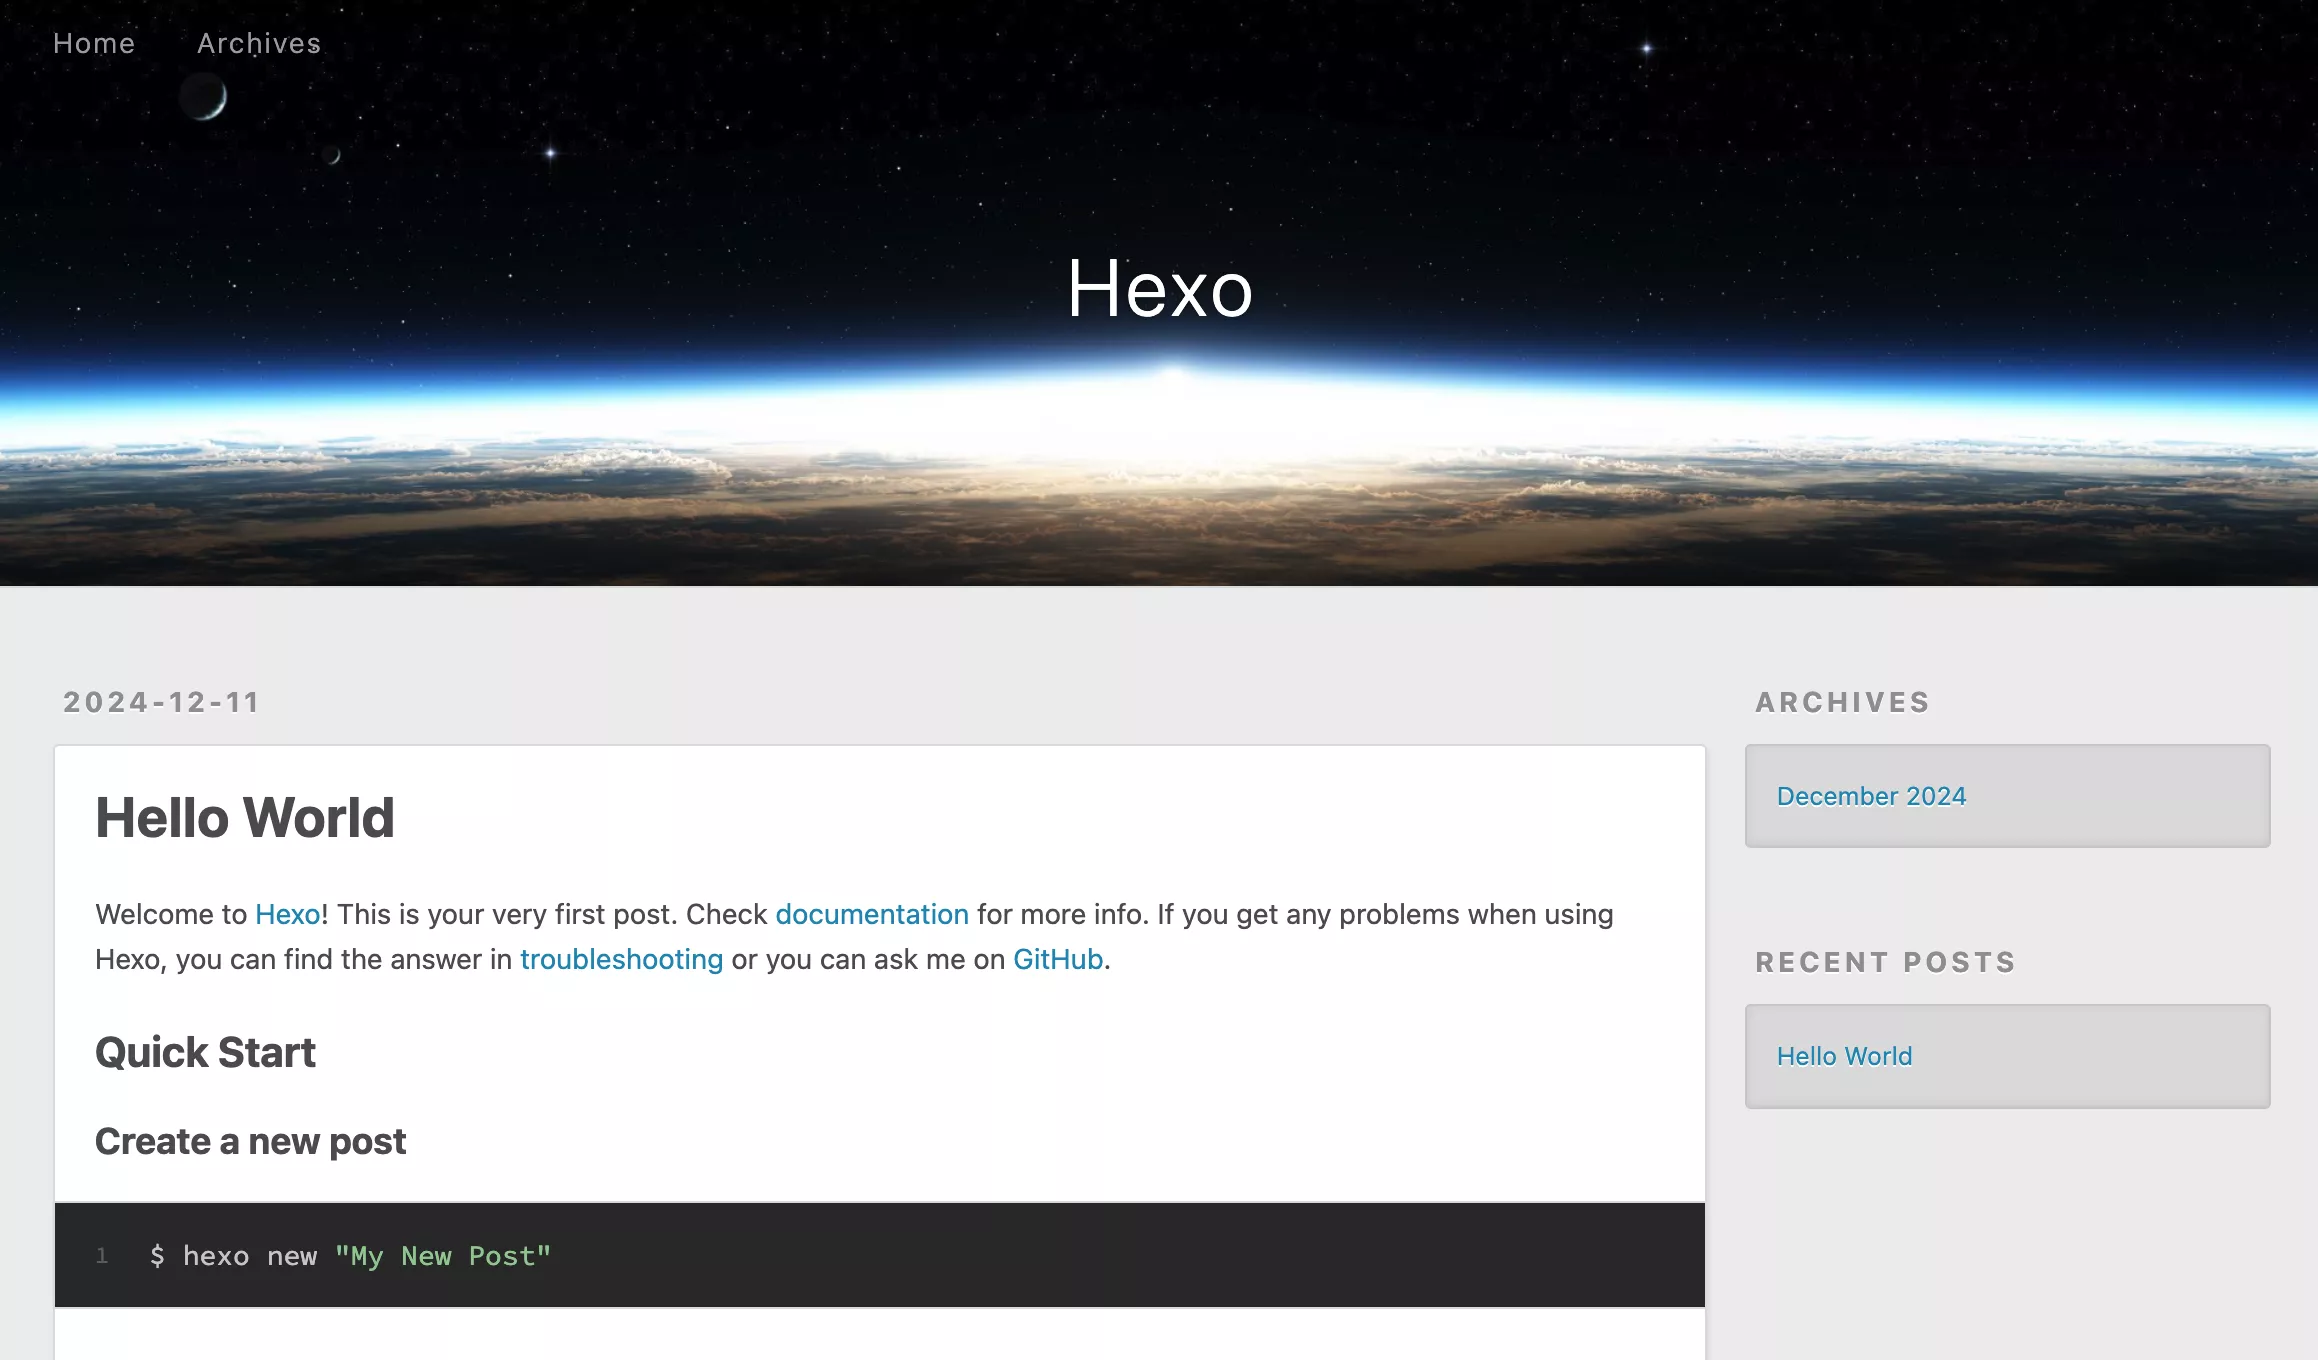
hexo s is the shorthand form of hexo server, which is much more convenient.
In VS Code, hold down Ctrl on Windows or Command⌘ on macOS and click the link in the terminal to open it quickly.
When it is no longer needed, press Ctrl + C to terminate the process.
Setting Blog Information
We need to edit the _config.yml file in the root directory to set up our own site information.
1 | # Site |
permalink refers to the URL format of the articles. I prefer to use post/:title.html, which is cleaner, where :title refers to the file name.

The default is :year/:month/:day/:title/, which automatically includes the publication date information.

When editing a YAML format file, there must be a space after :; otherwise, it will throw an error. The content can be enclosed in single quotes.
After editing, you can run hexo s again to preview.
Adding a Theme (Butterfly)
Hexo supports many themes. Below, we will use and configure the Butterfly theme.
First, install the required dependencies:
1 | npm install hexo-util moment-timezone hexo-renderer-pug hexo-renderer-stylus --save |
1 | pnpm install hexo-util moment-timezone hexo-renderer-pug hexo-renderer-stylus |
Open the terminal and run the following command in the blog directory to download the theme:
1 | git clone -b master https://github.com/jerryc127/hexo-theme-butterfly.git themes/butterfly |
Then edit the _config.yml file in the blog directory, and change the theme setting at the bottom from theme: landscape to butterfly:
1 | theme: butterfly |
Run hexo s to preview the theme effect.
To prevent future updates of the theme from overwriting our custom configurations, you can copy the theme's configuration file:
Windows CMD
1 | copy themes\butterfly\_config.yml _config.butterfly.yml |
macOS / Linux
1 | cp themes/butterfly/_config.yml _config.butterfly.yml |
Then we can customize the theme in _config.butterfly.yml under the blog root directory, where we can modify features and set up navigation menus.
For Chinese annotations of the theme configuration options, you can refer to the Butterfly Documentation (III) Theme Configuration
Adding Articles
We can use the command hexo n postname to create a new article. This command is equivalent to:
1 | hexo new post postname |
This will create a file named postname.md under the source/_posts folder.
We can edit this file using VS Code. The article uses Markdown syntax. After opening this file, we can see that some content has been automatically filled:
1 |
|
title is the displayed title of the article, date is the publication date, and tags represent the article tags. All of these can be modified. We can also add more information, such as categories and a cover image.
1 |
|
Inserting Images
Sometimes we need to insert images into our articles. We only need to place the images into the source folder in the Hexo directory. It is highly recommended to create a separate folder like images to store images.
Suppose we have two images 1.png and 2.png. The file directory will look like this:
1 | source/ |
When referencing them in an article, we only need to use the following Markdown syntax. The path starts with /, without source:
1 |  |
Although VS Code cannot preview the images normally, previewing them in the browser via hexo s will display them correctly.
Adding Pages
In addition to articles, we also need to add some pages (Pages):
Tags Page
Run the following in the Hexo root directory:
1 | hexo new page tags |
This will generate source/tags/index.md. Edit this file:
1 |
|
Then it can be accessed via http://localhost:4000/tags/ or https://yourdomain/tags/.
Categories Page
Run the following in the Hexo root directory:
1 | hexo new page categories |
About Page
Run the following in the Hexo root directory:
1 | hexo new page about |
about is not a built-in Hexo page type, so it does not need a type: field, but we need to write some self-introduction ourselves in Markdown or HTML format.
Adding Pages to Navigation
Edit the theme configuration file _config.butterfly.yml and modify the menu section:
1 | menu: |
Modifying the theme configuration file does not automatically refresh the preview under hexo s. You need to terminate it with Ctrl + C and rerun it.
After saving and running hexo s, you will see the menu in the top right corner.
Deploying to GitHub
We have completed the main configurations and created a new article. Now we will host the blog on GitHub Pages so that it can be accessed over the internet.
Go to https://github.com/new to create a new repository. The Repository name must be <username>.github.io; otherwise, it will not work.
Then open the terminal to install hexo-deployer-git:
1 | npm install hexo-deployer-git --save |
1 | pnpm install hexo-deployer-git |
Then edit the _config.yml file under the blog directory to configure the deploy section at the bottom.
1 | deploy: |
First, open the terminal to set up your Git identity:
1 | # Set Git identity |
Then run:
1 | hexo g |
We need to authorize the Git program. Click Sign in with your browser in the popup window.
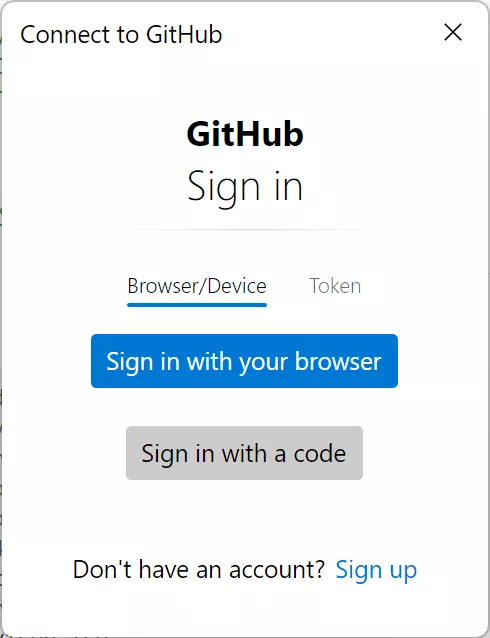
In the next step, click Authorize git-ecosystem.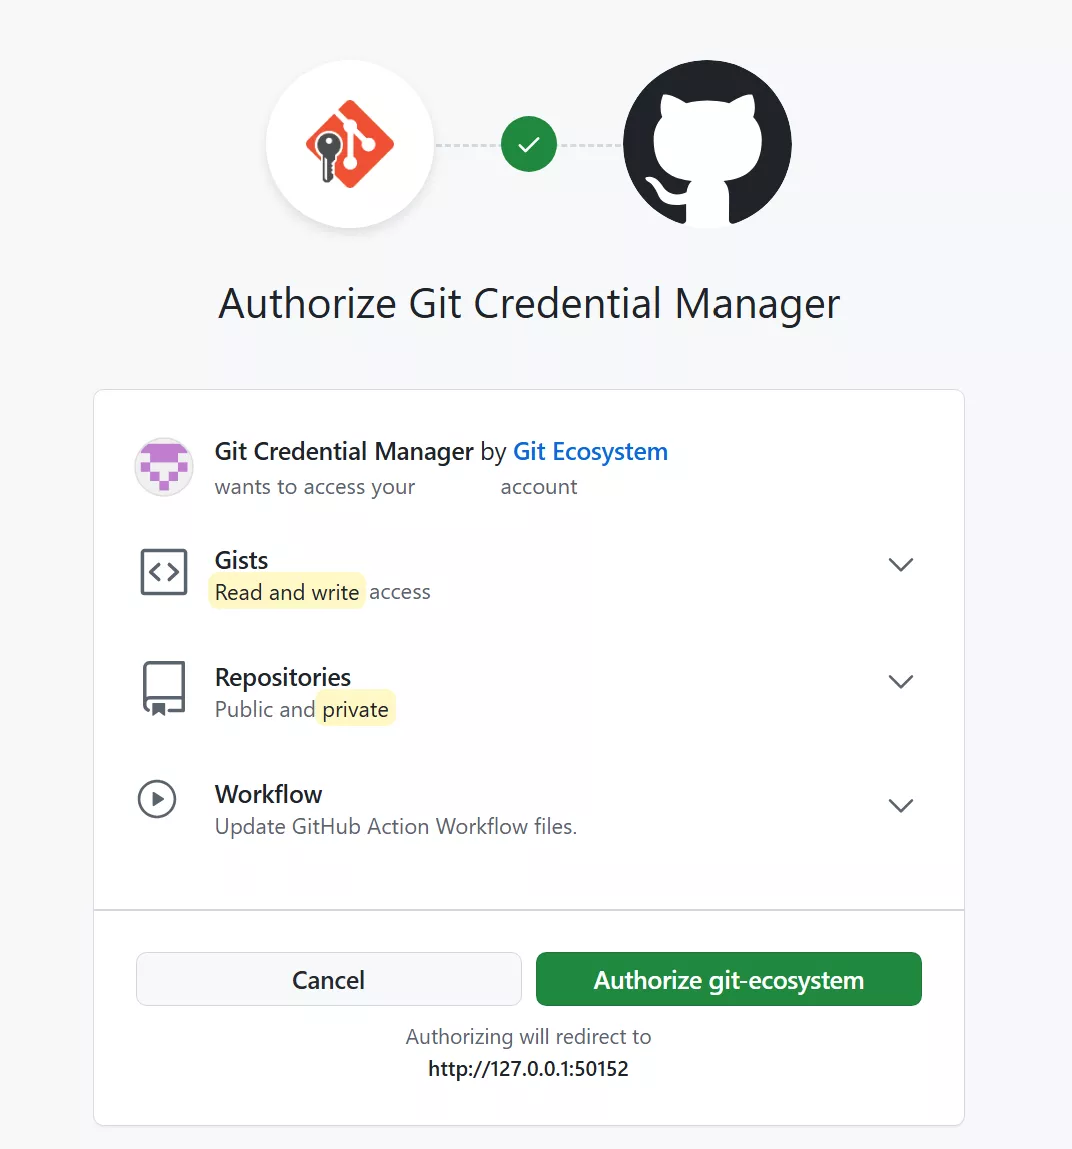
Then, enter your password to complete the deployment.
This will push the website to GitHub.
If successful, it will output something like:
1 | Writing objects: 100% (16/16), 1.27 KiB | 1.27 MiB/s, done. |
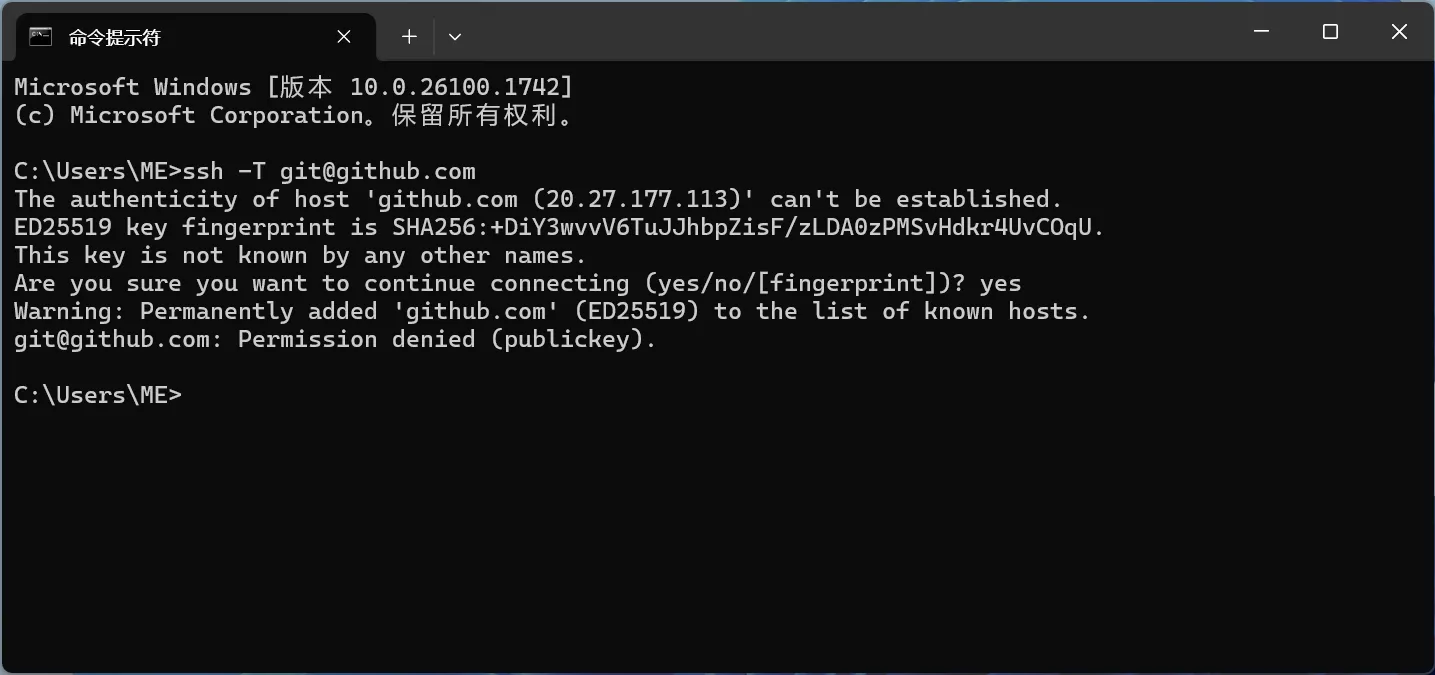
Advanced Tutorial: See How to Connect to GitHub Using SSH Key
Setting GitHub Pages
On the GitHub repository page, click Settings at the top, find Pages on the left, edit the Branch section, set it to gh-pages + /(root), and click Save.
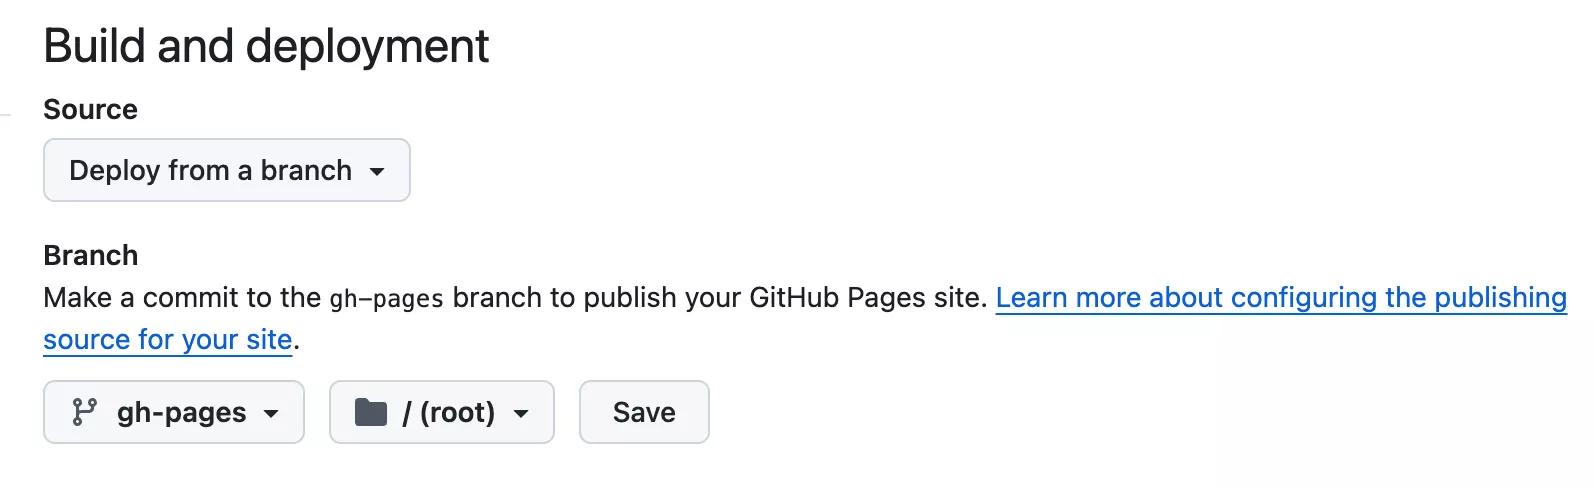
Then you can visit https://<username>.github.io to view the website. If it shows a 404, please wait a few minutes.
Binding a Custom Domain
Purchasing a Domain
If you have your own domain name, in addition to using the free secondary domain provided by GitHub, you can configure it to access your blog using your own domain name.
If you don't have a domain name yet, we recommend purchasing one from the following two websites:
- Cloudflare promises to sell domains at cost price, but generally does not have first-year discounts.
- Porkbun - click
Show All Extensions>Sort by pricein the search results, where you can often find great first-year discounts.
It is generally recommended to choose common suffixes like.comor.mefor registration.
Binding to GitHub
The first step is to go to your domain provider or Cloudflare, and add a CNAME record in the DNS settings:
- Type:
CNAME - Name (host): Fill in
@(representinghttps://ooo.run), or it can bewwwor another subdomain. - Content (target):
username.github.io

Step 2: Visit the GitHub website, and fill in your custom domain in the repository's Settings > Pages > Custom domain.
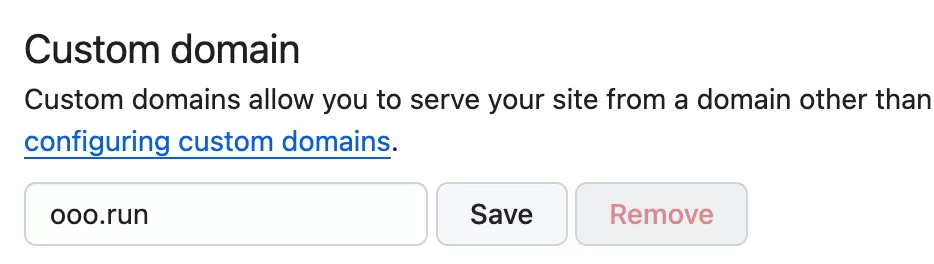
Step 3: Create a CNAME file under the source folder. The filename must be in uppercase letters with no extension, and its content should be the domain name you want to use, e.g., example.com.
Finally, run the commands to push the updates to GitHub.
1 | hexo g |
Then you can access your blog through your own domain name.
Adding a Comment System
Hexo does not come with a built-in comment system, so we need to add one ourselves. You can use:
- GitHub-based Giscus
- Self-hostable Twikoo or Arttalk
- Third-party comment system Disqus (contains ads)
For details, see Adding a Comment System to Hexo Blog: Giscus, Twikoo, Artalk, or Disqus
Common Hexo Commands
1 | # Local preview |
Advanced: Backing Up with GitHub
Our blog source files are saved locally. If you switch to another computer, you will need to back them up manually.
In the source files, we need to focus on:
sourcefolder: Stores the source files of the blog posts. If lost, you will have to start over._config.yml: Stores the site configuration settings._config.butterfly.yml: Stores the theme configuration settings.
The easiest way is to copy the entire Hexo folder directory and manually transfer it to other devices, and install Node.js and Git on the new device. This is suitable for those who only write on specific devices and rarely switch, since manual copying cannot keep multiple devices synchronized with each other.
Here we recommend using GitHub to back up our entire Hexo folder.
The following introduces backing up to the same repository as the blog. Since the repository is public, please do not store passwords or other sensitive personal information in your configuration files.
If you want to keep it private, you can create a private repository to store the backup.
Before starting, we need to edit the .gitignore in the blog root directory and add themes/ to the last line to ignore the nested Git theme folder:
1 | themes/ |
If you also want to back up the theme folder:
You need to open your file manager and delete the .git folder under the theme directory themes/butterfly.
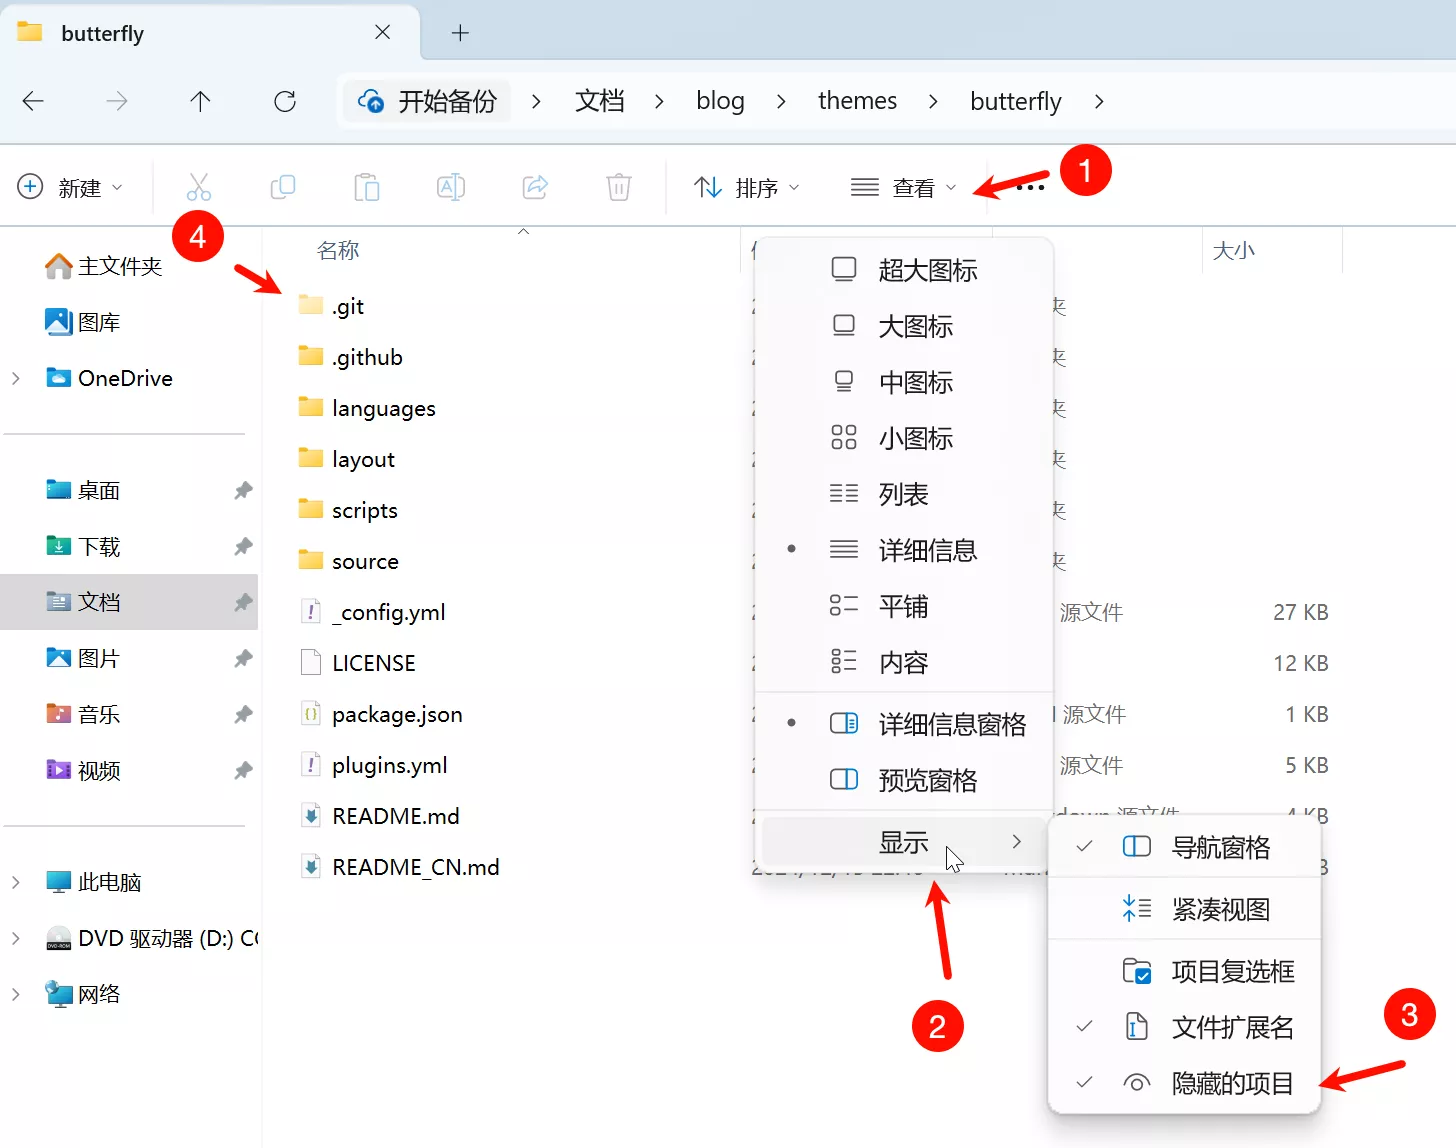
On macOS, you can press Command + Shift + . to show hidden files/folders.
Run the following commands in the Hexo root directory:
1 | # Initialize |
Committing Updates
After making updates locally, use the git push command in the Hexo directory to sync with GitHub.
1 | # If you wrote new articles |
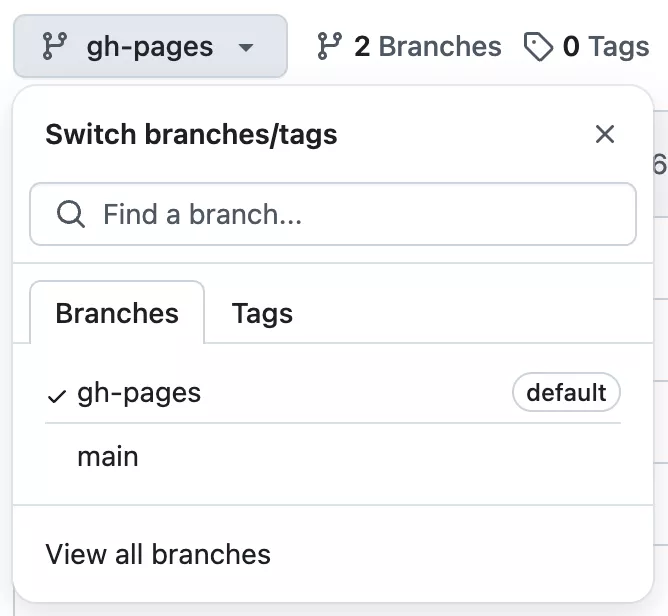
Now visit the GitHub repository and click the branch dropdown at the top. The main branch is where our backups are stored.
Retrieving the Backup
When the files on GitHub are newer than your local ones (for example, updated on another device), use git pull in the Hexo directory to sync locally:
1 | git pull |
When we switch to a completely new device, we need to install Node.js and Git first, and then fetch the backup from the GitHub server:
1 | # Download the backup branch data to the local computer |
Using GitHub Desktop
Too tedious to type commands every time? Install GitHub Desktop!
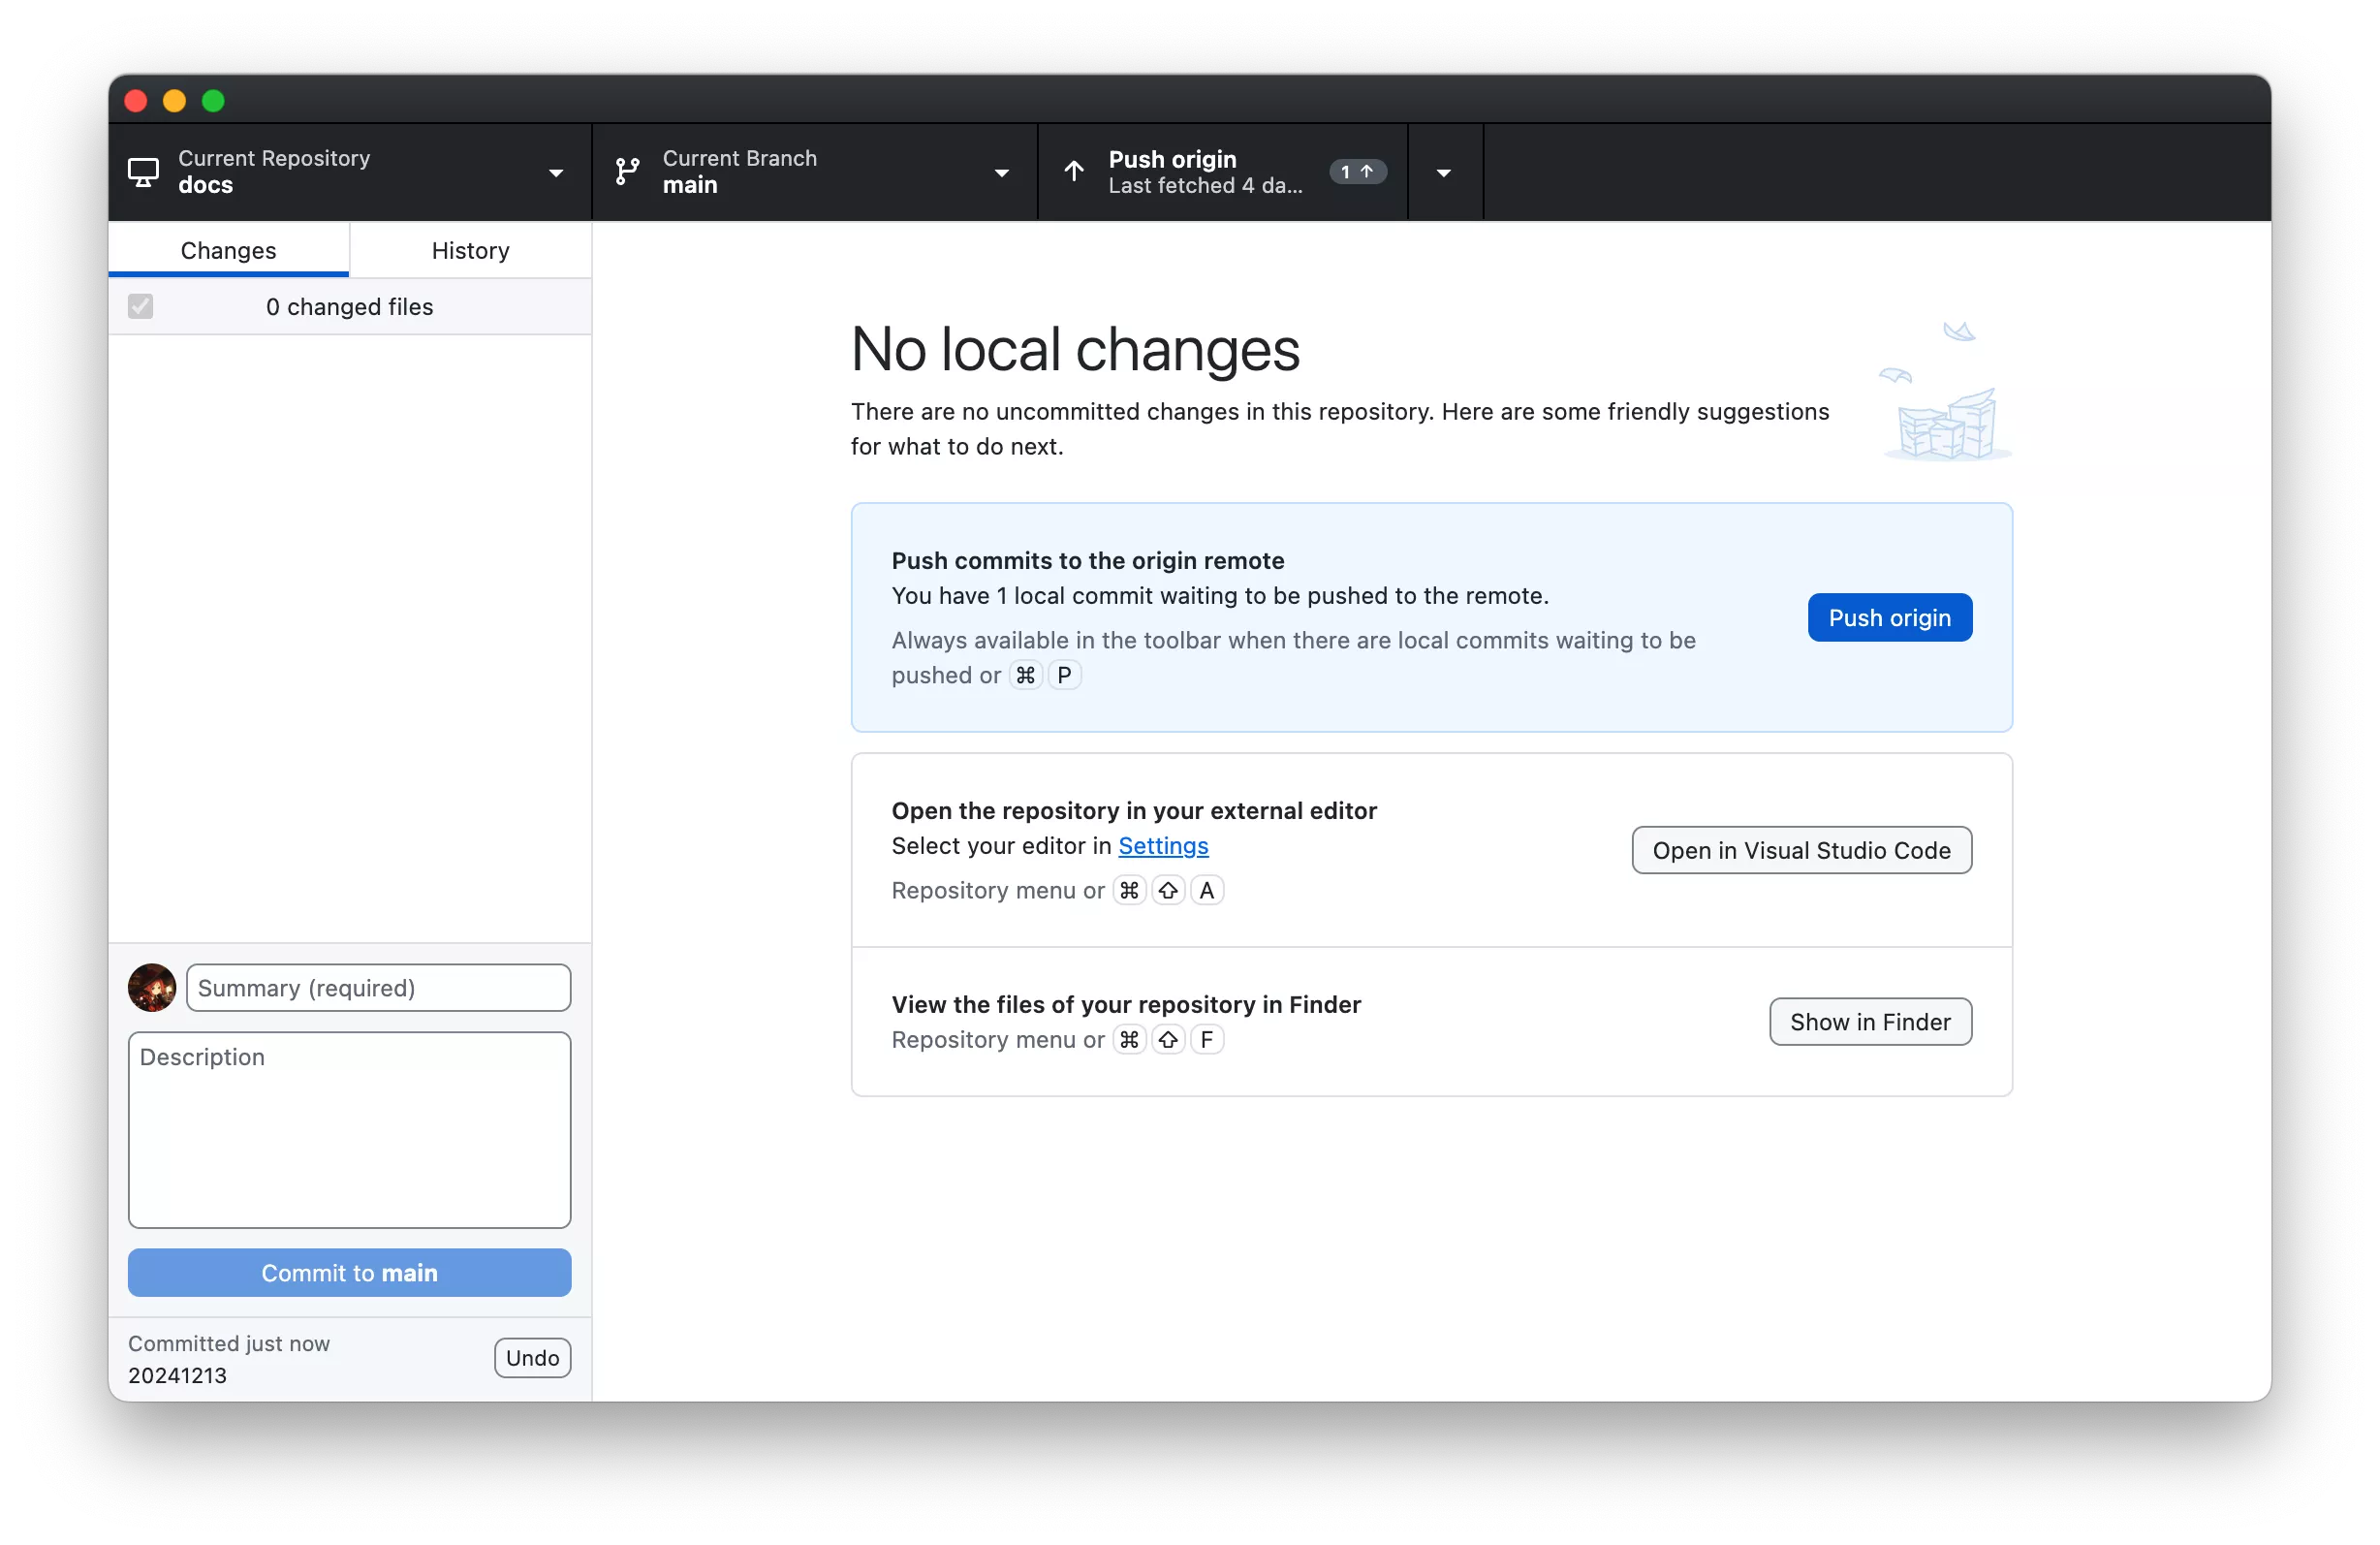
We can use the graphical interface for simple operations, starting with the button on the top right:

- By default,
Fetch originchecks for updates. - When the server is newer than local, it displays
Pull origin, meaning you can pull updates from GitHub. - When the local files are newer than the server, it displays
Push origin, meaning you can push updates to GitHub. After updating locally, you can write a summary in the bottom-left Summary field, clickCommit to main, and then push the updates.
Other Operations
Adding Search to the Site
Run in the Hexo root directory:
1 | npm install hexo-generator-searchdb --save |
1 | pnpm install hexo-generator-searchdb |
Modify the site configuration file _config.yml and append at the end:
1 | search: |
Modify the theme configuration file _config.butterfly.yml:
1 | # Enable search |
Then you can run the search:
1 | # Generate site files |
Adding a Sitemap
Run in the Hexo root directory:
1 | npm install hexo-generator-sitemap --save |
1 | pnpm install hexo-generator-sitemap |
In the future, when generating site files, the sitemap.xml file will be automatically generated. You can access it via http://localhost:4000/sitemap.xml during local hexo s previews.
Adding RSS Support
Run in the Hexo root directory:
1 | npm install hexo-generator-feed --save |
1 | pnpm install hexo-generator-feed |
Then edit the _config.yml file under the Hexo root directory, and append at the end:
1 | # RSS |
In the future, when generating site files, the atom.xml file will be automatically generated. You can access it via http://localhost:4000/atom.xml during local hexo s previews.
Garbled text when previewing atom.xml locally? Don't worry. This is an issue with the local server. The atom.xml file itself is completely fine and will display normally after being pushed to the server.
Setting Up Friends Links
In addition to the built-in Hexo page types, the Butterfly theme also supports configuring a friends links page:
Run in the Hexo root directory:
1 | hexo new page link |
This will generate source/link/index.md. Edit this file:
1 |
|
We also need to create a _data folder under the source directory, and then create a link.yml file, filling in the links in the following format:
1 | - class_name: Friends Links |

Comments